Best For You
Creating Stunning Screenshots: The Ultimate Guide to Cyberpunk 2077's Photo Mode
Welcome to the intricate world of Cyberpunk 2077. Night City, where the game holds its premise, offers a plethora of breathtaking or heart-stopping scenes perfect for photo ops, all depending on the current scenario. To capture these moments, players have access to a unique feature called Photo Mode. Understanding how to use this fascinating tool and its various settings can help you transform good photos into impeccable ones—even amidst a gunfight! This guide takes you through every step.
The Key to Accessing Photo Mode
To indulge in the creativity of Photo Mode, understanding how to enable it is paramount. Thankfully, the process is relatively simple across different platforms. For PS4, PS5, Xbox One, Xbox Series X, Series S or PC (only when with a controller), simultaneously pressing down the pair of analog sticks, L3 and R3, activates Photo Mode. When playing Cyberpunk 2077 on PC, pressing 'N' opens up Photo Mode. You can opt to disable it if accidentally enabled during gameplay by visiting the primary Cyberpunk 2077 settings. The miscellaneous section under Gameplay settings gives you the privilege of turning Photo Mode on or off according to your preference.
Dive Deeper into Photo Mode
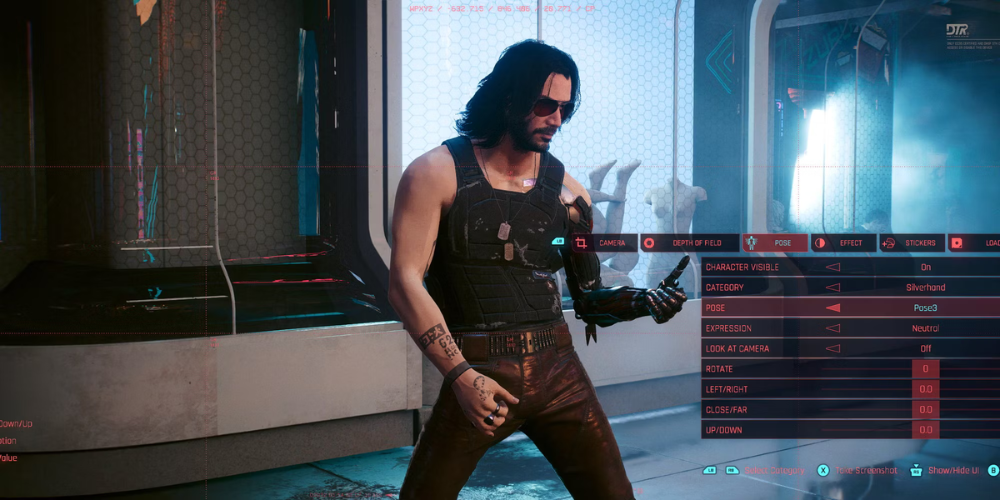
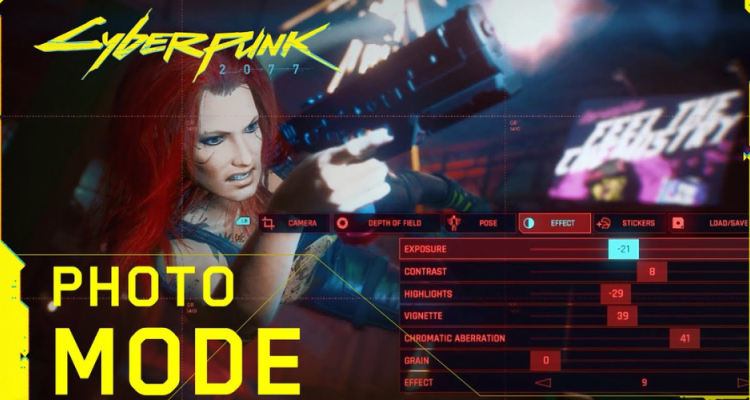
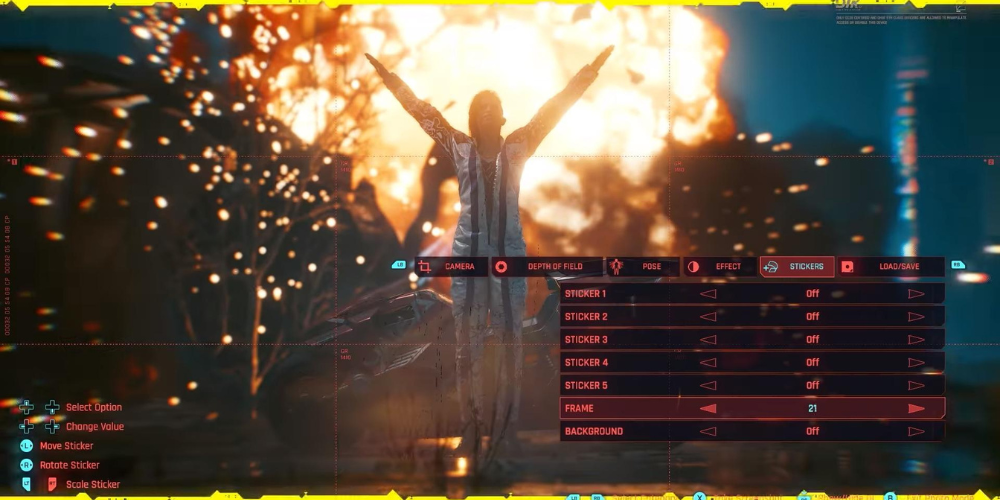
Surely, you could use the Photo Mode to snap a quick image. But if you are looking for that awe-inspiring picture worthy of attention, exploring the different settings should be on your to-do list. Below are the five sets of configurations available for you to play around with:
- Camera: As the name implicitly means, this gives you control over the camera used in capturing the scene. It’s up to you to switch from first to third-person POV, vary the rotation, and change the field of view. Additionally, there are preset camera setups for easy photographing.
- Depth of Field: This setting determines what the camera zooms in on. You can adjust it to blur either the picture's foreground or background—a useful tool when you want to spotlight specific elements or characters within your image.
- Pose: Want V, the primary character, to pose a certain way? Use this setting. Choose from a range of poses divided into idle and action. You even have the option of adjusting their facial expression or making them disappear from the picture entirely.
- Effect: To transform the photo's actual color, this is the setting to explore. You can play around with exposure levels, highlights, and contrast, among other features. Want a black-and-white effect? No problem, Effect can do that as well.
- Stickers: Personalize your photos further by adding stickers—up to five—to your picture. Choose from 196 options; you may spend quite some time deciding! You will also find the means to add a backdrop or frame to your picture in this setting.
Preserving Your Preferred Settings
The Load / Save option in the Photo Mode settings menu allows you to preserve your most-loved camera setups. You can save up to three different sets of Photo Mode configurations and load them whenever desired.
Unleashing Your Creativity
Apart from the settings, remember that you have the capability to manually move and rotate the camera to your liking. Now that you are armed with the knowledge of manoeuvering Cyberpunk 2077's Photo Mode, feel free to venture into Night City and capture the beauty—or chaos—it holds. Good luck!